What rendering means in interior design, classic 3D rendering versus AI renders from a photo, and how to get realistic light, materials and prompts.
- ✓ A rendering is a photorealistic image of an interior that doesn't exist yet: new furniture, materials or a whole renovation.
- ✓ Classic 3D rendering is to scale and fully controllable but needs a model and time; an AI render from a photo takes minutes but isn't a plan.
- ✓ Good AI renders come from a good photo, specific materials, clear lighting and small steps.
In interior design, a rendering is a photorealistic image of a room as it will look: the furniture, colors, materials and light, before anything is bought or built. Designers use renders to get a client’s yes; homeowners use them to stop guessing. There are now two ways to make one, and they’re good at different things.
Way 1: classic 3D rendering
The room is built as a 3D model, usually in software such as SketchUp, 3ds Max or Blender, then rendered with an engine such as V-Ray, Corona or Enscape.
- Strengths: to scale, every detail controllable (a light fitting, a grout line, a fabric pattern), any camera angle, and it works for rooms that only exist on paper.
- Weaknesses: it needs a model, skill and time, and every variation means more work on the model.
Way 2: an AI render from a photo
You photograph the existing room, describe the direction, and an image model produces a new version of the same room.
- Strengths: minutes instead of days, many variations, and the real room with its real light as the starting point. Ideal for finding a direction.
- Weaknesses: not to scale, no free camera, and the AI sometimes invents details: a different window handle, a missing outlet, a reflection that couldn’t exist.
The comparison
| Classic 3D rendering | AI render from a photo | |
|---|---|---|
| Starting point | 3D model from plans | Photo of the room |
| Time per variation | Hours to days | Minutes |
| Dimensionally accurate | Yes | No |
| Control over details | Complete | Through your description, limited |
| Best for | Construction, custom pieces, final presentations | Style direction, options, first client conversations |
In practice they complement each other: AI renders early, when you and your client are choosing a direction, and a 3D model once measurements, joinery and quotes come in.
How to get a good AI render
1. Start from a good photo. Daylight, from a corner, camera level at chest height, no extreme wide angle. Whatever is distorted in the photo gets furnished wrong.
2. Name materials precisely. “Wood floor” leaves too much room; “oiled white-oak wide-plank floor, matte” doesn’t. The same goes for fabrics (bouclé, linen, velvet), metals (brushed brass, matte black steel) and stone (travertine, terrazzo).
3. Describe the light. Time of day and color temperature change a render more than any piece of furniture: “warm evening light, 2700K lamps” or “bright, diffuse daylight”.
4. Say what must stay. Name it explicitly: walls, windows, floor, ceiling height. Otherwise the AI “improves” the architecture too.
5. Work in small steps. The overall direction first, then one change at a time. Five requests in one sentence rarely produce a coherent image.
A prompt that works for this kind of render:
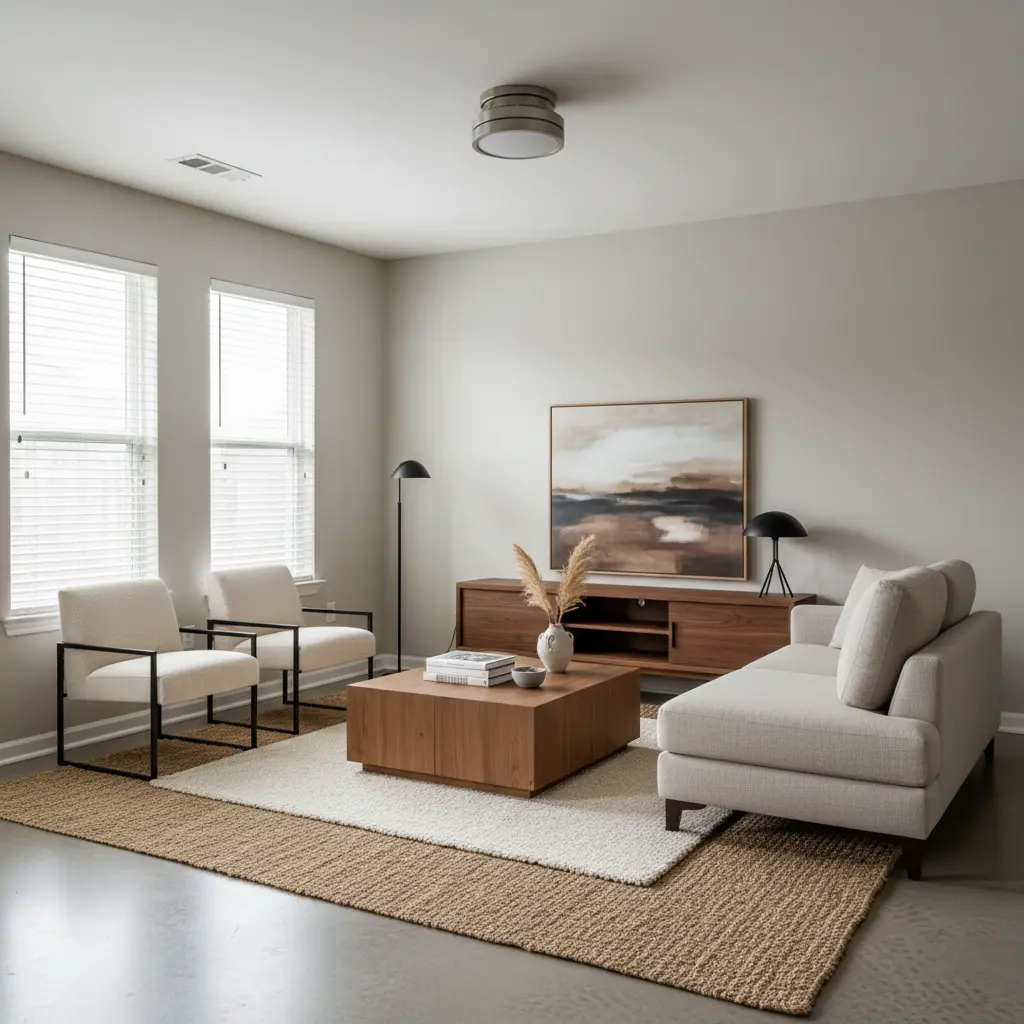
Living room in a mid-century modern style. Keep the walls, windows and concrete floor unchanged. Walnut sideboard on the back wall, two armchairs with black metal frames by the windows, jute rug, an abstract painting in earth tones. Bright, diffuse daylight.
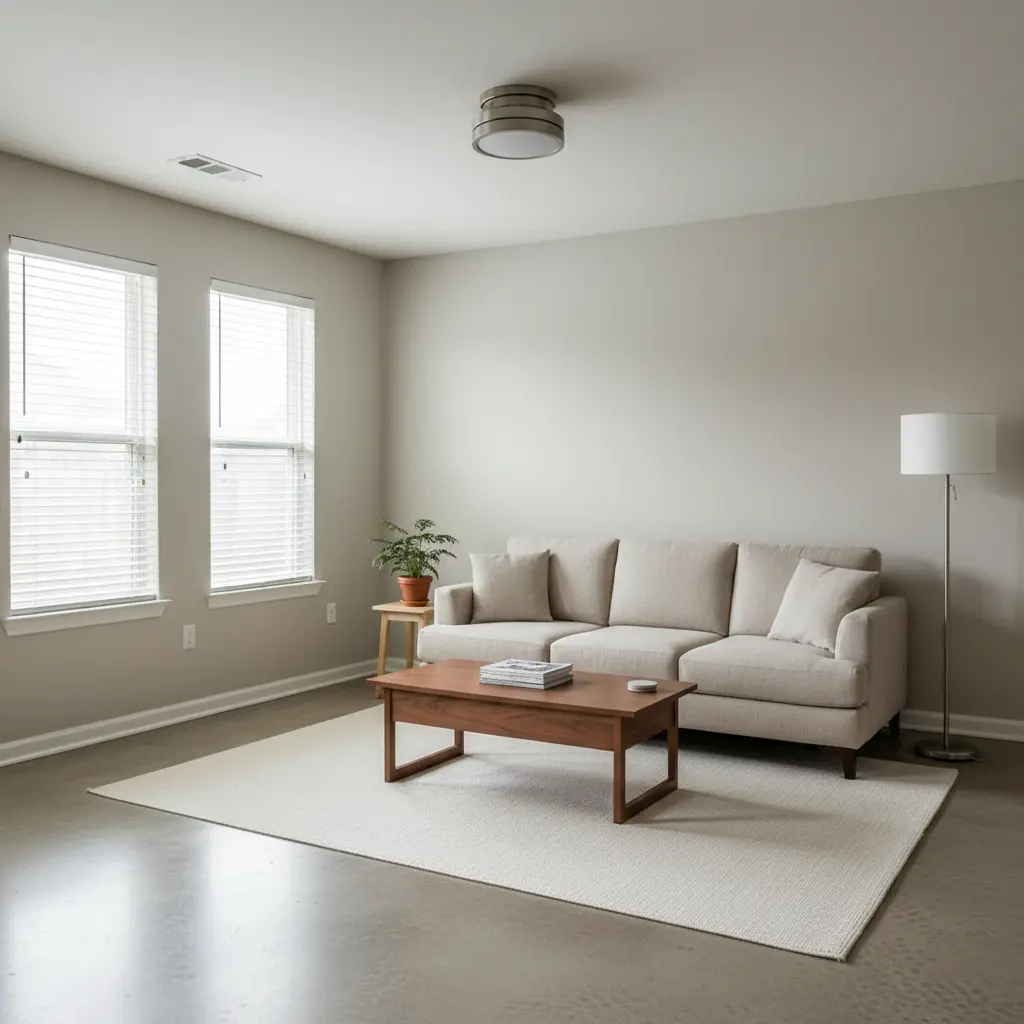
An example from Tigmi where that worked: the walls, windows, floor and ceiling light stayed; only the furnishings are new.
The limits, honestly
- No dimensions. No AI render will tell you whether the sofa is really 94 inches long. Measure.
- No exact products. The AI shows a sofa like a particular model, not the model itself.
- Small details aren’t always right: lettering, reflections, handles, outlets. Look closely before you present.
Interior rendering with Tigmi
With Tigmi you upload a photo of the room, choose the room type and one of 16 styles, and add your own notes on materials and light. A couple of minutes later you see your room in the new direction.
From the Basic plan, Room Lock and Light Lock tell the AI to keep the architecture, windows, floor and the direction of daylight. Images are up to 2048 px on paid plans; for client work and other commercial use you need Pro or Business.
When a render works, Shop the Look identifies the furniture in it and finds similar products from real retailers in 45 countries, which turns a mood into a shopping list. The first image each month is free.
Related: how to write better prompts and the glossary entry on photorealistic renders.
Tigmi Team
Product & EditorialThe people who build Tigmi, an AI tool that redesigns real rooms from a single photo. We write about what we learn testing styles, prompts and room photos every day.
Frequently Asked Questions
What is rendering in interior design?
A rendering is a realistic image of a space as it will look: furniture, colors, materials and light. Designers use it to show a client the result before anything is bought or built. It's made either from a 3D model or, with AI, from a photo or sketch.
Can AI replace a 3D rendering?
For finding a direction, comparing options and early client conversations, often yes. For construction drawings, custom joinery or anything that must be accurate to the inch, no: that still needs a 3D model.
How long does an AI interior render take?
Usually a few minutes per image. In Tigmi a redesign takes a couple of minutes; most of the time goes into comparing and refining versions.
Ready to see your room reimagined?
Upload a photo of your room and get a photorealistic redesign in a couple of minutes. Your first 3 redesigns each month are free.